Last Updated on October 26, 2025 by Michelle
I am head-over-heels in love with sourdough bread.
I love it even more now that we’ve figured out how to make sourdough bread without any discard. Today I’m sharing my exact recipe and the technique I follow every week to make two loaves of sourdough bread right here in our farmhouse kitchen.
Go here if you’d like to know how to double your sourdough bread recipe.
This post contains affiliate links. See my full disclosure here.
I do make other bread, now and then… especially my Maple Sandwich Bread, which I’m kinda in love with. I had tons of fun as a guest chef at the Xhibition Kitchen in Boston last month, where they asked me to demonstrate this favorite recipe from my newly-released, #1 in Food Science, book, Sweet Maple.


Isn’t Sourdough too Complicated?
While sandwich bread is a little simpler to make, and doesn’t require any daily maintenance, there’s something about the gorgeous crumb of a well-made sourdough loaf.
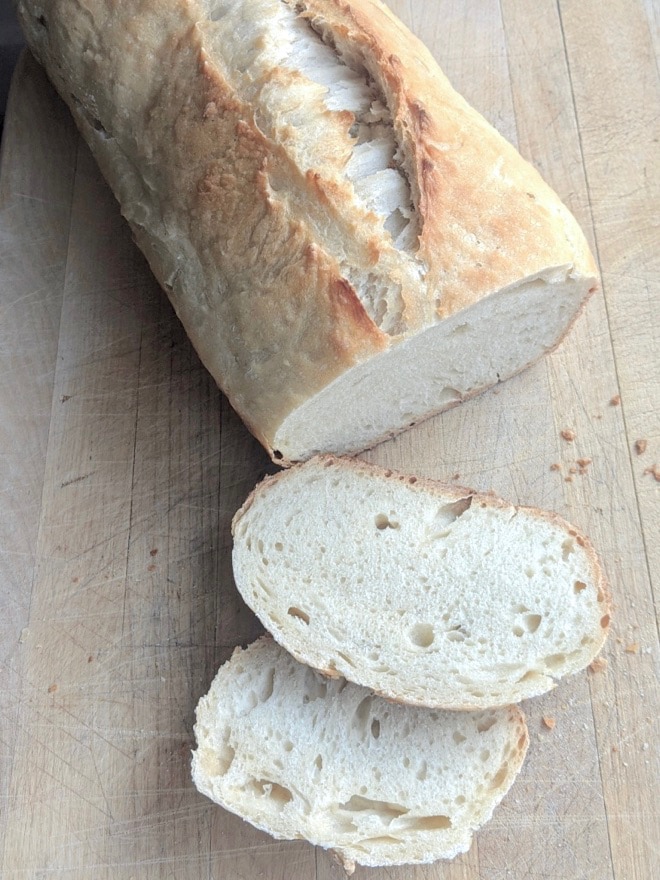
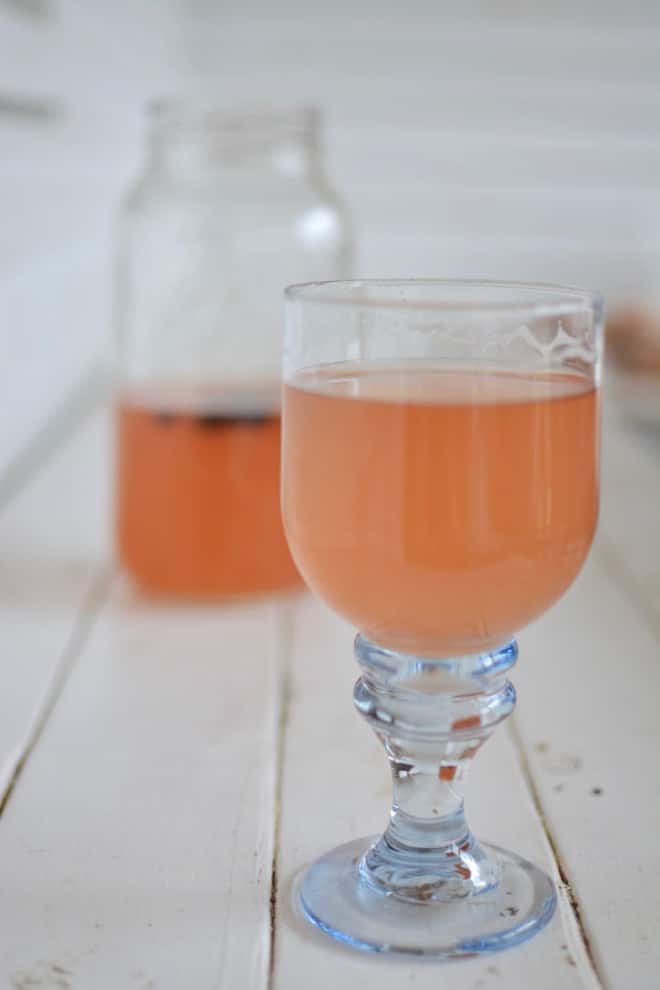
And that slightly sour taste… And that amazingly, lightly crisp crust… And the fact that this deliciousness is fermented amazingness–capturing good bacteria and yeast from the air, just like my homemade kombucha that I love so much.
This post contains affiliate links. Go here to read the full (ultra fun) legal disclosure about that.
On one hand, yes, sourdough bread is more of a commitment than my sandwich bread recipe (you can find that in my book, btw, Sweet Maple, available on Amazon or, even better, grab a copy here and support local businesses with your purchase.)
But I’ve decided sourdough bread is very much worth the effort.
Plus, it’s really not complicated. The fact is, I have unmeaningly neglected my sourdough for a week or more at a time. It’s sitting right there on my counter and I totally forget to feed it. Every time it’s been totally fine. I’ll discard any hard crust that’s formed, rescue the drops of good dough-y-ness left and feed it well.
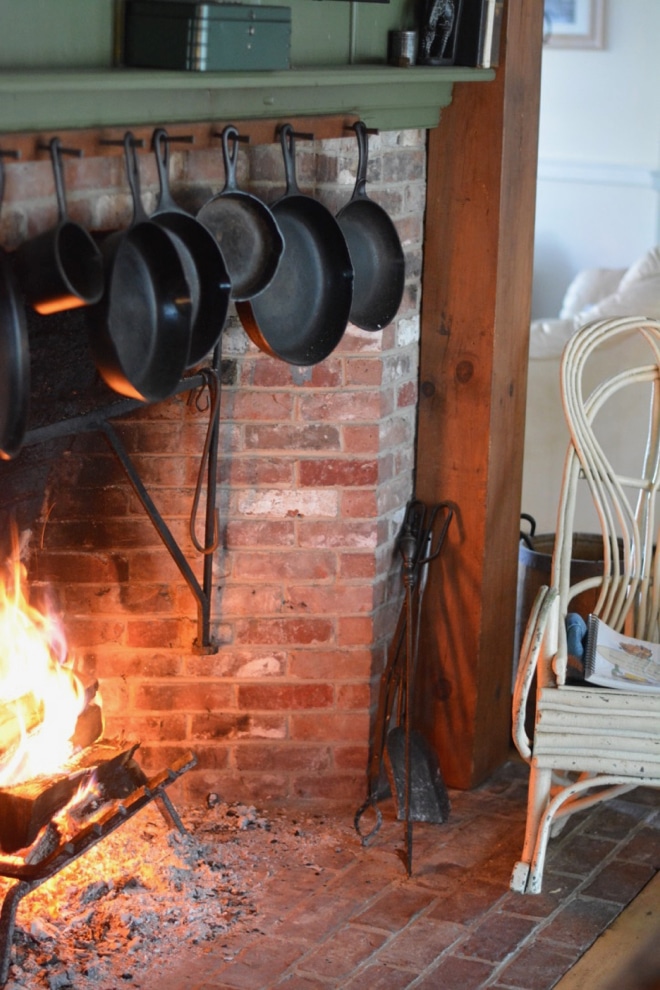
And on baking day I just make sure to choose a day that I know I’ll be around home. I can be out in the garden, doing farm chores, or just pulling up a chair by the kitchen fire, with my laptop in hand doing work in my favorite office ever. I just need to remember to check in on the bread process at the right times throughout the day. It only takes 5-10 minutes of my time a few times throughout the day, and voila we have amazing, fresh, good-for-our-gut bread for dinner (and all week long).
btw, if you would like to know what items I would not want to have to live without here in my farmhouse kitchen (like my most-favorite-ever ceramic bread pan) you’ll want to check out this list of my favorite kitchen items.
Do You Need a Starter?
Yes, you need a sourdough starter before you can make sourdough bread. While it’s super easy to make this yourself, you can buy one as well.
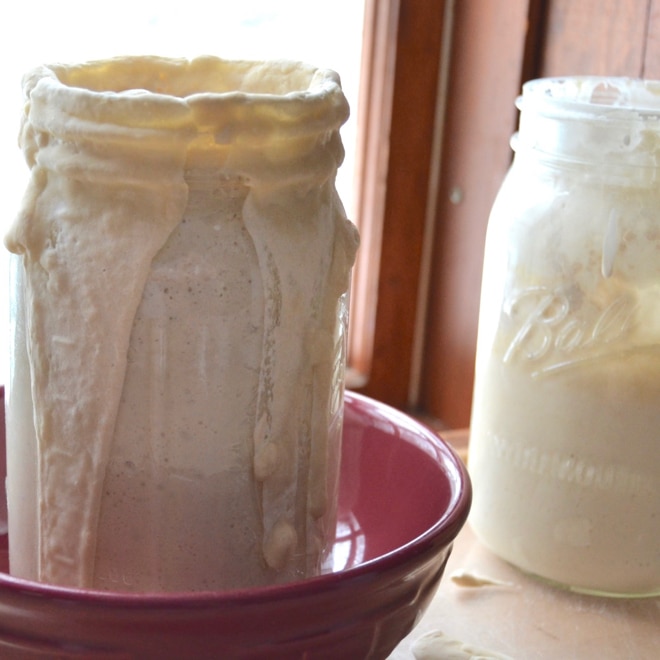
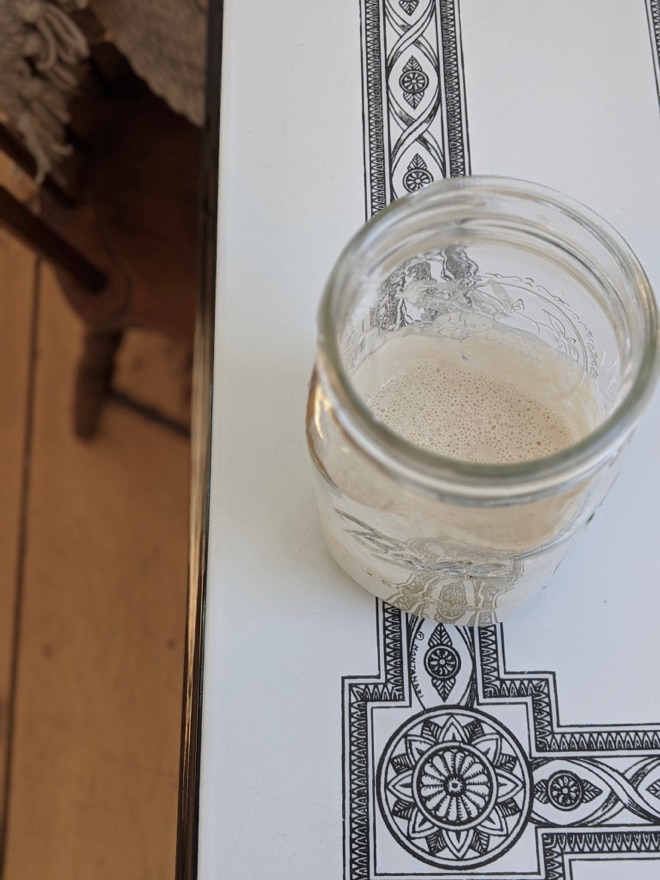
A sourdough starter is simply flour and water that you give a little bit of attention. (2:1 flour and filtered tap water.. or any water that is free of chlorine, which can kill a starter.) When it’s well cared for, it makes bubbles. In fact, this is how you will know your starter is ready to use–a lot of beautiful bubbles will fill your starter, probably by day 7-10 if you’re using white flour. Day 2-3 with wheat flour, because wheat ferments faster. (btw, feel free to start with wheat then switch over to white; no problem.)
It’s those wonderful bubbles that magically make your bread rise.
Once you have a starter, you never have to make one again.
I will tell you that I care for my starter a little differently than most people do. I hate the idea of throwing away a cup or more starter every day–which is the way most folks recommend you do it. But it just seemed so wasteful. Yes, I know there are numerous recipes that call for a cup or two of sourdough, but I’d rather build up my starter a few days ahead when I want extra, so I have enough when I want to do those things, than throw away starter aimlessly and often. (Building up my starter simply means I feed it lots of flour and water–at a 2:1 ratio–a few days before I want to use it.)
So I keep my starter in a plain ole, wide-mouth quart jar, covered with a small piece of fabric (to keep unwanted bugs out). Then, on an average day, I simply feed my starter a little flour and filtered water and stir it well with a narrow wooden spoon. I don’t measure my amounts of flour and water, just add enough of each to keep the starter a nice, thick, pancake-batter thickness. No it doesn’t grow quickly, but I find it’s just the right amount when it’s time to make bread once a week, which is 2 cups of starter (since I double the recipe below) and a nice layer of starter left behind.
How Do I Make Sourdough Bread (with no discard)
What I do once a day
Daily you want to feed your starter… add filtered water, then add flour until the starter is the consistency of heavy cake batter… Just keep in mind that you’re better with too much flour than too much water. Well, in my opinion at least. This way you’ll have less holes in your bread, (in the “crumb”) and a very nice slice of bread.
And you’ll find it easier to get your bread to rise if your starter is thicker, not watery. Also, if it’s too watery it doesn’t have enough body to double.
And don’t sweat it if you forget to feed it one day… or 3 or 4. It will survive a lot of neglect. You just may not have a nice bubbly starter ready for your next loaf of bread.
Two nights before bread-baking day, feel free to add more flour and water if it’s not looking like you’ll have enough bubbly starter for the recipe.
What I do the night before
It sounds more complicated than it is to say that making sourdough bread is a 2-day process because honestly the first day’s effort is almost non-existent. You mix a few things together in a bowl. That’s it.
In a large bowl, add these ingredients:
1 1/2 cups warm, filtered water
1 cup sourdough starter
3 cups of flour
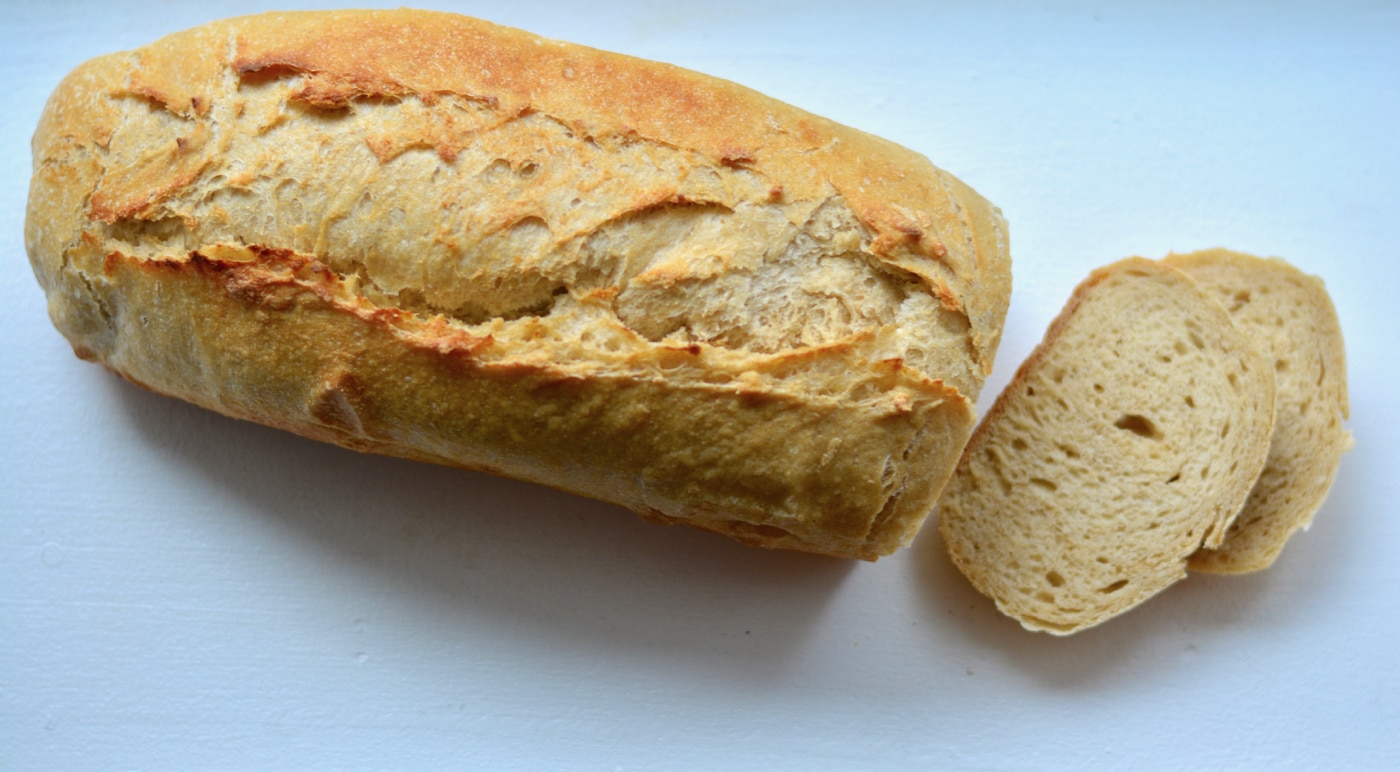
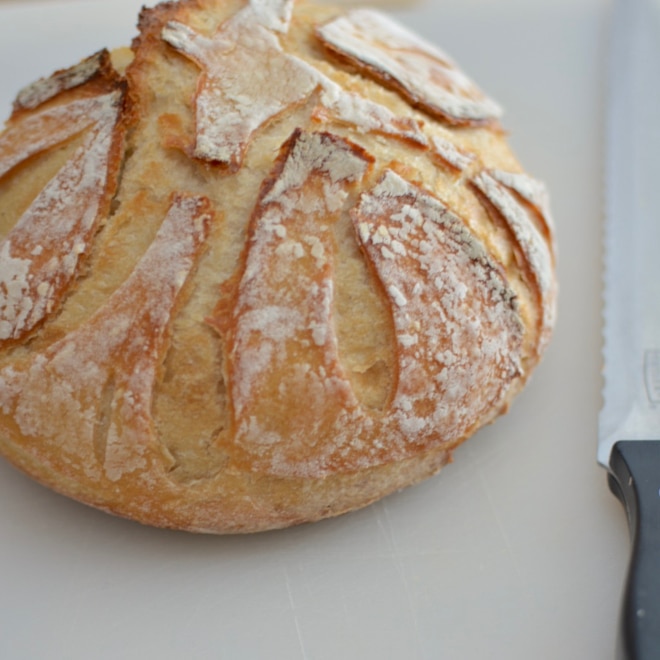
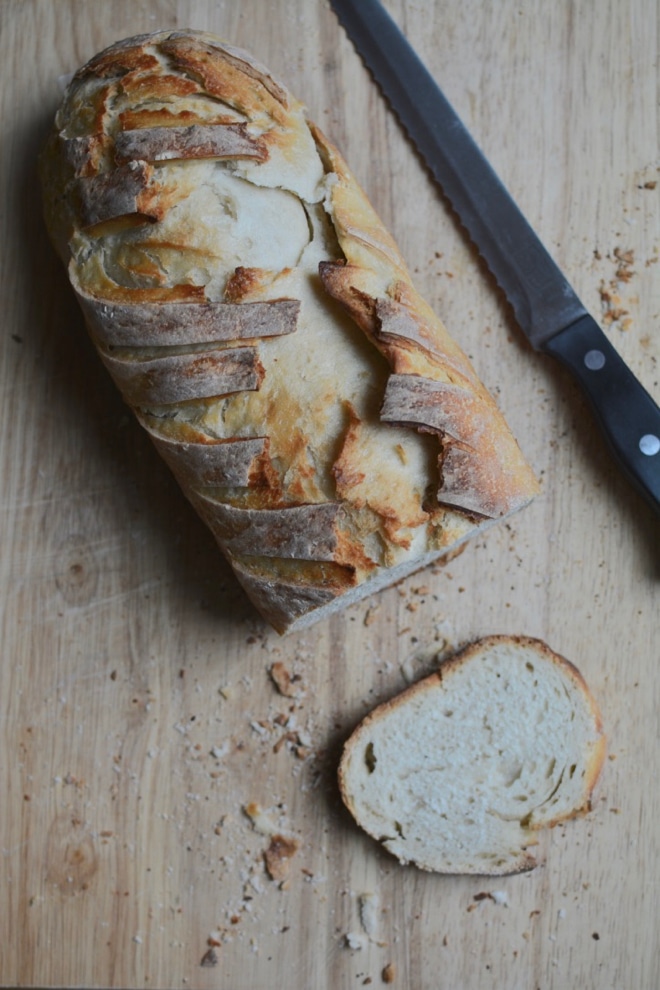
I double this each week, to make the 2 loaves you see below. I recently shared the full details on how to double your sourdough bread recipe too.
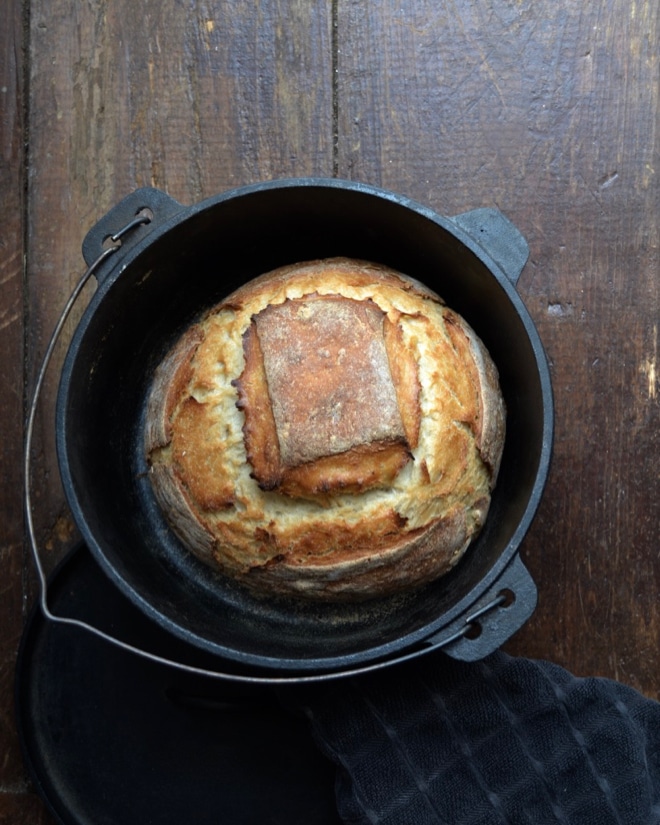
With this recipe doubled, I make one long loaf in my favorite bread pan and one round artisan loaf in a dutch oven.
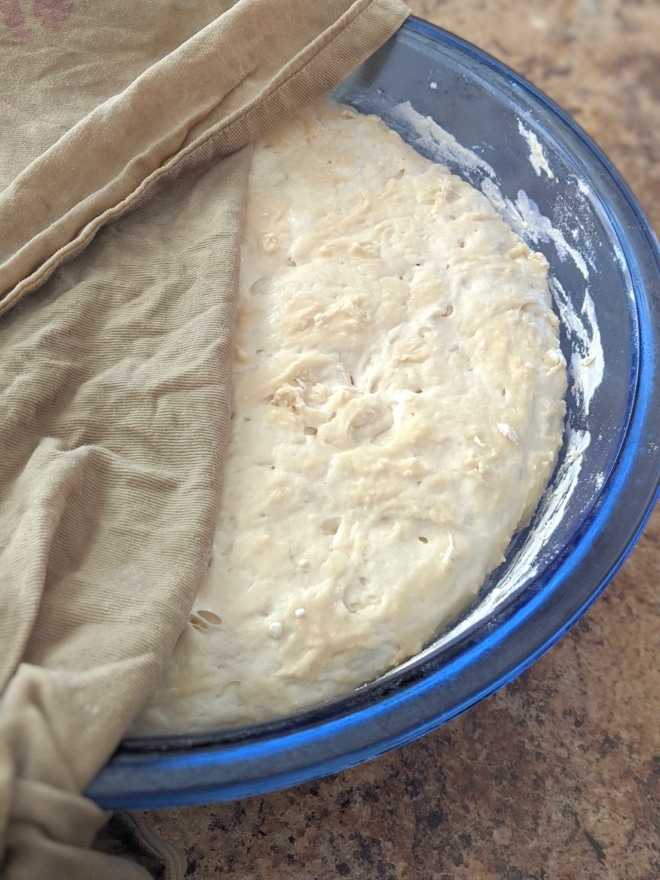
Mix & let set overnight in bowl on your kitchen counter that you’ve covered over with a towel.
You don’t even have to mix it super well. It doesn’t need to be like true dough.
But you do need to be sure to leave enough starter to be a thick layer on the bottom of your jar. I take this opportunity every week to switch my sourdough starter over to a new, clean, wide-mouth Mason jar. I’ve let it sit in the same jar a few weeks at a time but always regretted how difficult it was to clean the caked-on mess.
What I do on baking morning
In the morning, you’ll find your dough is filling up much more of the bowl. You may also find it’s gotten a little “crusty” in spots on the top. If so, you can lay a wet towel on the dough for 10-20 minutes to soften it up. It doesn’t always “work” and that’s totally fine. There’s no problem with using the dough with a few little crusty spots in it.
Add these ingredients:
1 tb sugar (I use maple sugar or this pure cane sugar)
2 1/2 tsp salt (this salt is my favorite)
1 cup of flour (I like this flour but I get my wheat berries here)
Add up to 1 more cup of flour if needed. Knead just until all combined and nice texture; not too sticky.
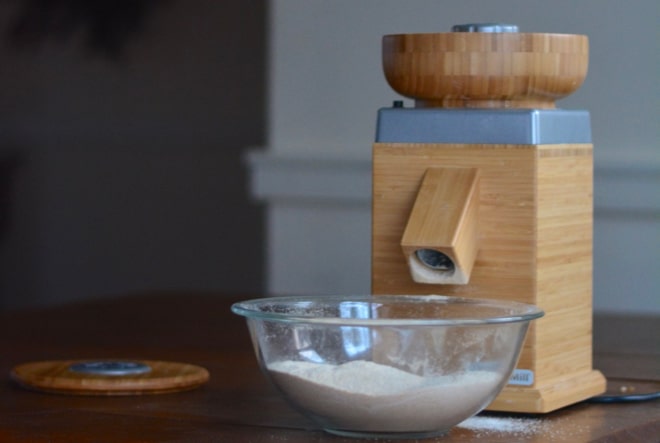
You can use any sugar and any flour you would like, btw. I’ve gotten more picky about my sugars and flour over the years. I will use all-natural maple sugar or this pure cane sugar (I buy it at my local Aldis) and mill my own flour, which I often use in a 1:1 ratio with this flour. I love my grain mill. It does an amazing job and looks gorgeous on my counter. See my grain mil right here, or you can check it out on Amazon too.
But sourdough with fresh flour is a whole new ballgame, so definitely check out my tips: Sourdough with Fresh Milled Flour
If you want to use fresh milled flour you will have the most nutritious bread possible. I’ve priced around and tried different varieties. I am most happy with the wheat berries that happen to also be the most economical; that doesn’t happen often in life!
I order these wheat berries for bread, and these wheat berries for baking pastries and cookies and such.
But fresh milled flour is never necessary for amazing sour dough bread. In fact, any flour and any sugar you have on hand will be just fine.
Roll dough lightly in flour if still a tad sticky, then place in bowl twice it’s size, that you’ve prepared with a thin layer of oil (I spray on olive oil using this wonderful tool), and cover bowl with a towel (or plastic wrap that you spray underneath, so the rising dough won’t stick to it). Unlike other homemade breads, there’s no need to set your bowl in a draft-free area.
Granted, in colder areas, like my drafty old kitchen, it will take longer to rise–up to 3-4 hours–but it will have more of that delicious sourdough flavor the longer it takes to rise.
But you could do things differently
My oldest daughter (the Mechanical Engineer), Logan, happens to be quite an engineer of bread too, and she likes to do everything up to this point the day before she’ll be baking her bread. Then this rise she’ll let go even longer and slower, overnight in the fridge.
She also isn’t a fan of having her sourdough on her small counter area in her small kitchen, so Logan keeps her dough in the fridge until the day before she wants to start a new loaf. Then she feeds it a cup or more of flour with enough water to make a nice consistency (more watery than my pancake-batter consistency I go for) early that morning, before going to work, and again the same amount at night, and it’s ready to be used the next day.
I call my slow-and-steady starter the country starter and her fast-and-quick version the city starter. (She does live and work in Boston, so it’s appropriate.)
What I do on baking afternoon
When it’s about 1.5x in size, it’s time to divide your dough. (Sourdough doesn’t double. Or if it does, it’s probably overproofed.)
Simply jiggle the dough out of the bowl and onto your counter (believe it or not, there shouldn’t be a need for flour on your counter, but dust some on if you find you need it). I divide my double-batch of dough into two pieces, one about 1/4 of the overall amount and one about 3/4.
But if you’re just doing a single loaf, no need to divide your dough.
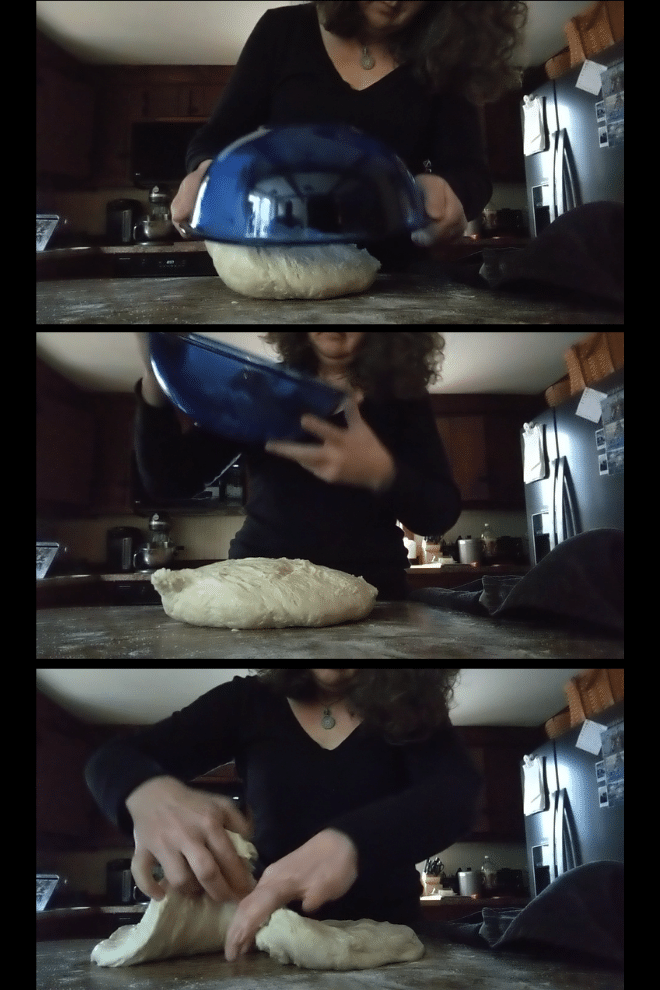
Turn bowl over and plop dough onto counter. Divide. Then gently flatten both sections of dough separately, using light finger or knuckle pressure. Create two “balls” by pulling a top “corner” in, pressing down, and rotating your circle of dough 90 degrees. Keep doing this until your dough is no longer stretchy, about 10-12 pulls/turns. You now have a nice ball of dough, which will lead to a firmer, airy loaf of bread.
Turn the balls over and lightly dust w flour. Cover each with a towel and let rest for 10 minutes. (This is called a “bench rest.”)
After 10 minutes, smooch each into rectangle the right length for your pan (or just a square for an artisan loaf that will be baked in a dutch oven).
If you’re more of a visual person, see the whole bread-making process right here in my instagram highlights.
I then make a kind of “house” shape then roll the dough, from the pointed “roof,” down, firmly pressing the dough together with each roll. I will pinch the seam and/or pull the log or circle of dough along the counter to try to eliminate a seam.
For an artisan loaf, I spray a medium-sized pyrex bowl with oil. (I love this oil sprayer that allows me to use pure olive oil instead of chemical-laden aerosol cooking spray.)
Then cover in a dusting of flour. For the long loaf, I get out the right sized parchment paper. (Yes, I reuse my parchment paper again and again.)
Meanwhile preheat your bread pan(s) at 425. (For me, this is a cast iron dutch oven and this ceramic loaf pan that I happen to be in love with.)
I place my ball into its prepared bowl, seem side up. And I place my long log on parchment paper inside of the lid of my ceramic bread baker. (While the bottom of the pan is preheating.) I cover the bowl and lid with a kitchen towel and set them both in a draft-free area for about 1/2 hour.
I know it’s done rising when a gentle finger poke doesn’t bounce back.
Place your ball of dough on parchment paper, sized to fit your dutch oven, and score. (See below for more about scoring.)
Then, using the paper to lift it easily, plop the ball of dough in your preheated dutch oven, and place lid on pan.
Lift the long loaf out of the lid it’s been rising in, place it (on its parchment paper) into the hot bread pan, and cover with top.
Bake both on center rack at 425 for 20 minutes. Then remove lids and leave an additional 10 minutes or so, until crust is done.
Watch Every Step of the Process
I documented my process, from starter to bread, one day on my instagram stories and saved the whole bread-making process right here if you’d like to watch.
While you’re there please say “hi” and follow my page. I find instagram to be my favorite “hang out,” and would love to see you there.
The Only Hard Step in the Process
Then comes possibly the hardest step of the entire process…
Wait.
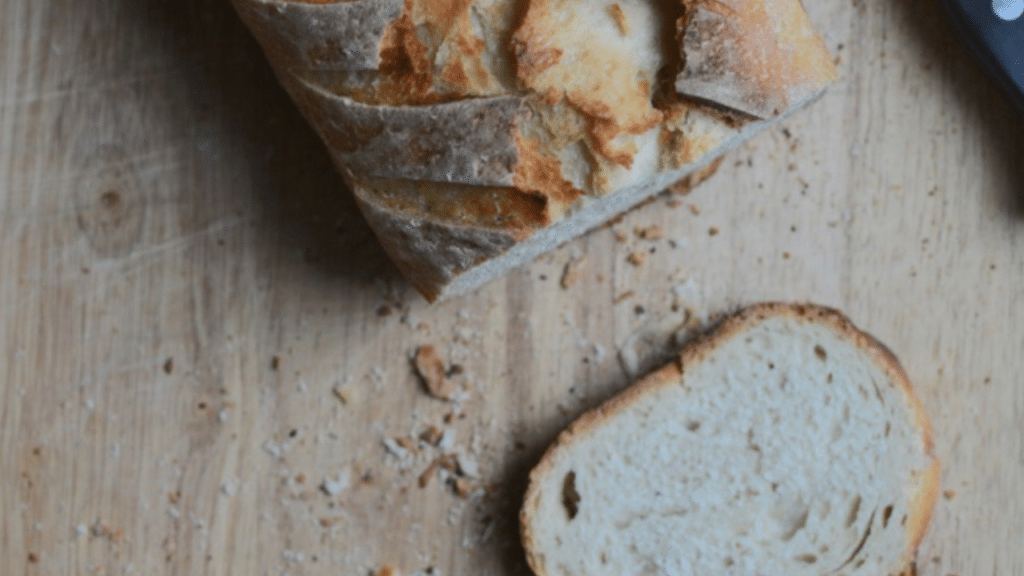
Don’t give into your temptation to cut into that wonderful smelling loaf right away. If you do, you will have doughy, squishy bread. Wait 20 minutes and you’ll be greeted with a firm yet airy piece of bread that you will be quite certain is a taste directly from heaven.
Your Questions About Making Sourdough Bread (without discard)
Yesterday, when I was making our loaves for the week ahead, I had this crazy idea that I would invite folks on instagram to join in and be a part of the process as the day unfolded. I wasn’t expecting it to be such a popular thing! So I saved the stories to a sourdough highlight for you to check them out anytime, and then I pulled this article together to give everyone answers to all the questions I was flooded with. Such as…
Why bench rest the dough?
A few of you asked if the bench rest is really necessary. I’m not an expert by any means, but from what I’ve read, this little nap gives the gluten in the dough time to catch it’s breath, so to speak, and recover, which means it can reform the protein chains that are the overall structure of your bread.
Why don’t I need to add yeast?
Crazy enough, sour dough starter captures natural yeast from the air in your home.
Will my sourdough starter get moldy?
A sourdough starter should never develop mold. I’ve had mine for years and never had a problem with mold. If you do see mold in your starter, from what I understand the cause can only be one of two things: a not-clean container or spoon was used to start your starter or your flour source may be contaminated
Why is it sour tasting?
You might not like the sound of this, but believe it or not that delicious, slightly sour taste come from not one but two bacteria. These are good-for-your-gut bacteria: Lactobacillus and acetobacillus — which grow right there in your jar, beside the wild yeast, and help ferment the sugars in the dough.
Is homemade sourdough bread always sour tasting?
Well, actually, no. While some starters are quite sour tasting, some are not. In fact, it’s not actually called “sourdough” because it’s sour. The name refers to the fact that the starter is fermenting, thus you are “souring” the dough… but the taste is not necessarily a sour taste.
I don’t like sourdough that I’ve purchased at a local bakery. Will homemade taste the same?
The loaves you purchase are often sour tasting thanks to added vinegar or other flavoring agents. In fact, very seldom is purchased “sourdough” a fermented bread at all. So you may be very surprised how different your homemade sourdough bread tastes compared to some you’ve purchased that is too sour tasting for you.
Does it matter if I score the bread and how I score it?
Speaking from experience, I can tell you you do not have to score your bread. I’ve forgotten that small step more times than I care to remember. But sadly, every time, I’ve wound up with an unusually cracked, often pretty ugly, loaf of bread. You see, the oven heat causes the dough to expand and there’s lots of air in the dough dying to get out. It will get out, one way or another. So when you score your dough you’re controlling where the air will escape.
As for how you score it, that’s totally up to you. I kinda like experimenting with different scores to see how pretty the final result turns out to be.
What pans are the best to use?
I’m no expert on all your options, but I can tell you I’ve tried many things, from standard loaf pans to stoneware and I’ve settled on two pans that I always use and love the results.
For a round artisan style loaf nothing beats my good ole cast iron dutch oven. Bonus, it makes amazing stews and soups too, rather it’s over our open fire in our old farmhouse kitchen, on the stove top, or in the oven.
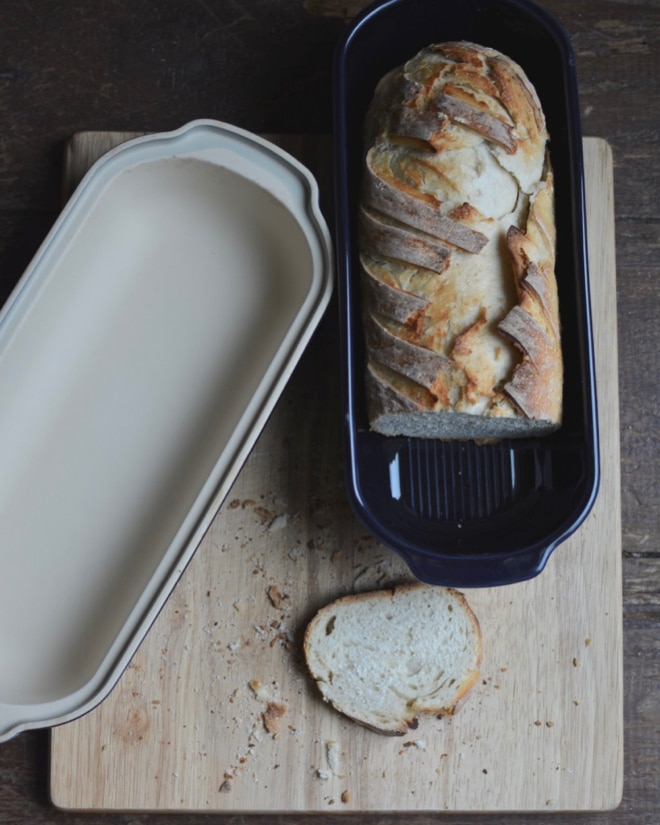
For a long loaf, I love the amazing results I get with this ceramic bread pan. Yes, I am well aware of the price tag, and that is exactly why I spent years trying other things. But I wish I had just bit the bullet and started with this pan. The results are amazing, and the pan paid for itself in about 1/2 a year of bread making. From then out, I’ve been making bread at home much better than I can buy anywhere–for only the cost of a little flour, sugar, and salt and the electric to run the oven. But I often have dinner or cookies ready to go in when the bread comes out, so even the electric expense is pretty much null and void.
So, yes, in a way, we now have amazing, free bread every week.
And I couldn’t be happier.
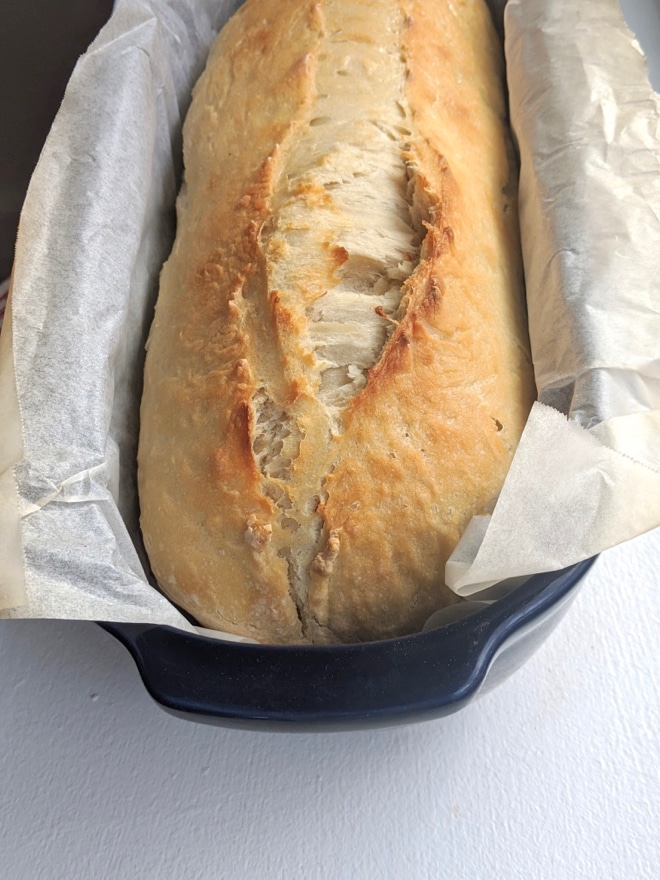
btw, that last picture I staged after baking, to show you the gorgeous lid with this pan. But when baking I like to use parchment paper under my bread. You don’t have to. The pan bakes the bread wonderfully with or without the paper, but I like the ease of clean up and the ease of transferring the dough to the pan after letting it rise on parchment paper while nestled in the lid of the pan (while the base of the pan is preheating). This is the picture I took when it was done its final rise (in the lid), I had scored it, and was ready to lift it into the hot preheated pan to bake.

And Now… I’ll Come Clean…
I kinda have to pinch myself every once in a while that I seriously get to make this delicious bread so often. Lest I deceive you, I gotta come clean about two things….
1. I am no June Cleaver.
I’m not a keep-the-house-spick-n-span or wear-an-apron-while-i-cook kinda girl. Nope. Dust bunnies in the corner and flour on my pants. (Cause I hate aprons.)
Trust me, if I can do this, anyone can. If you want proof, just take a listen to the premier episode of my new podcast, below.
2. I didn’t perfect this recipe.
Kayla, my homesteader-at-heart-since-she-was-a-little-girl spent years perfecting this. I only took over the efforts this winter when she announced she would be spending the long New England winter on the Gulf of Mexico with Hayley and Jordyn, her sister who was interning at the Texas State Aquarium.
While I had no control over the quietness in the house this winter, I had total control of the sourdough operation. And I was shocked at how much I loved it. (The bread making. Not so much the quietness.)
And don’t forget I list out all my favorite kitchen items right here–you know, the ones I’d hate to have to do without, and yes, my ceramic bread pan is #1 on my list.
Want more sourdough?
Go here to find out my favorite sourdough “tool” of all time, as well as all the items I wouldn’t want to be without in my farmhouse kitchen.
And other links you’ll love:
A review of my three favorite cookbooks of all time.
Make your own giant cookie that the kids will love.
How a homesteader makes French toast.
Products I LOVE that can turn every kitchen into a homestead-kind-of kitchen.
Aspire to live quietly, and to mind your own affairs, and to work with your hands. I Thessalonians 4:11
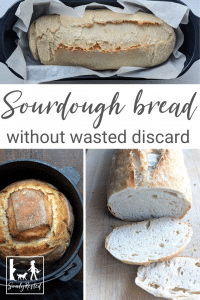
Pin this for later!
Click on the image below to pin this post.
Find out why SoulyRested was considered to be one of the Top 20 Must-Read Homesteading Blogs of 2018 and then one of the Top Homesteading Blogs of 2019 as well.

I’d love to connect!
To find me in some other neck of the woods, just click any (or every!) icon below:


Was wondering if you use 1 or 2 of the emile henry bread pans when doubling your sourdough recipe?
Also when doubling the sd recipe how many 8x 5 metal pans should I use?
Thank you for your time
Deb
I use TWO of the emile henry bread pans every week when I make this double recipe. I’m honestly not sure how that would equate to smaller pans… maybe 3?
When you say you “add a little water and flour” to your starter every day – how much is “a little”? Let’s say I’ve got two cups of starter – how much water & flour do I add each time?
David
PS – Just saw your interview on Relatable. My wife watched it first and laughed out loud at your backstory – we were called to move to New England from California in 2018 (a friend of a friend knows you, as it turns out).
Unless you plan on using it in the next day or so (in which case I build it up a lot), no need to add more than maybe a TB of flour and enough water to mix it in (also about a tablespoon or two)… I don’t measure just add until it’s the right consistency. So nice to “meet” you, btw, we moved here from DE in May 2014 and have met many folks who also felt the tug to move here as well, from all over the U.S… so cool. (Who’s the friend of a friend?)
My friend is Heidi J (who, apparently, you taught a class that she was in some years back), and her friend is Charles T (who, apparently, you helped with some dietary issue that I don’t know).
Your story was funny for us because, like you, we were called to move here, and then (incrementally) became homesteaders. So, your story was a lot like ours (which we found rather edifying, to be honest).
Such a small world!
And I do find it very intriguing… many folks have the very same story… God calling their family to New England and realizing when they get here that homesteading is one of the jobs He’s prepared in advance for them. God is good and man I’m thankful He allows little old me to join in on His beautiful tapestry of a plan for History.