
Last Updated on June 20, 2024 by Michelle
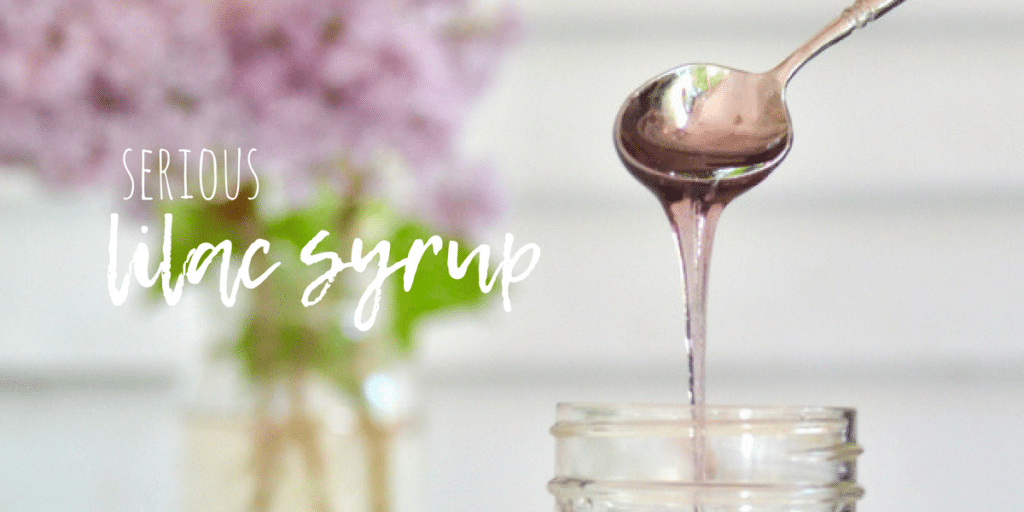
Mention “syrup” or “pancakes” and you have my attention; “lilac pancake syrup” stops me dead in my tracks.
But everything I’ve ever read about how to make lilac pancake syrup, well, none of it was written by a sugarmaker.
Now I’m not bashing the liquidy sugary cordial that food bloggers describe when they talk about lilac syrup. In fact, I wrote about how to make it here and how to water bath can it and lots of great ways to use it in this post just last month.
But as a sugarmaker, I gotta tell you that recipe. . . it’s oh-so-easy and oh-so-yummy. . . but it’s not really “syrup.” It’s liquid sugar with a pleasant lilac undertone. It’s wonderful for flavoring every drink from lemonade to cocktails to lilac blueberry kombucha (my current favorite obsession). But if you’re looking to slather some thick lilac sweetness on your pancakes tonight?
Then keep reading for the 9 simple steps you wanna follow for “genuine” lilac pancake syrup.
I should say, you could give this a try with any fragrant blooms you can gather in your yard (or a neighbor’s yard?) this week. If you make a different floral version of syrup, please let me know!
If you’d like to plant some beautiful lilacs of your own, I highly recommend Nature Hills for the best lilacs you’ll find anywhere. They’re the largest online nursery with the best customer service ever, they offer a huge variety of plants, shrubs, and tree, and they even have many rare, heritage plants that are rather hard to find these days.
But maybe the best thing about Nature Hills is that when you purchase a plant, shrub, or tree from them, you’re purchasing a plant that has been grown and tended to with care and is shipped to you right from the field.
Disclosure: This post contains affiliate links.
9 Steps to Thick Lilac Syrup
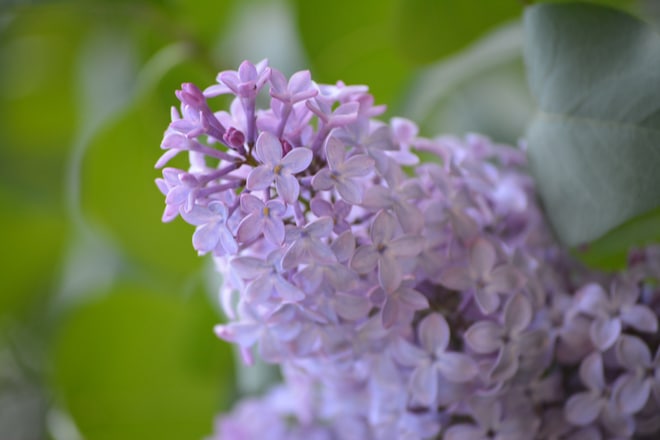
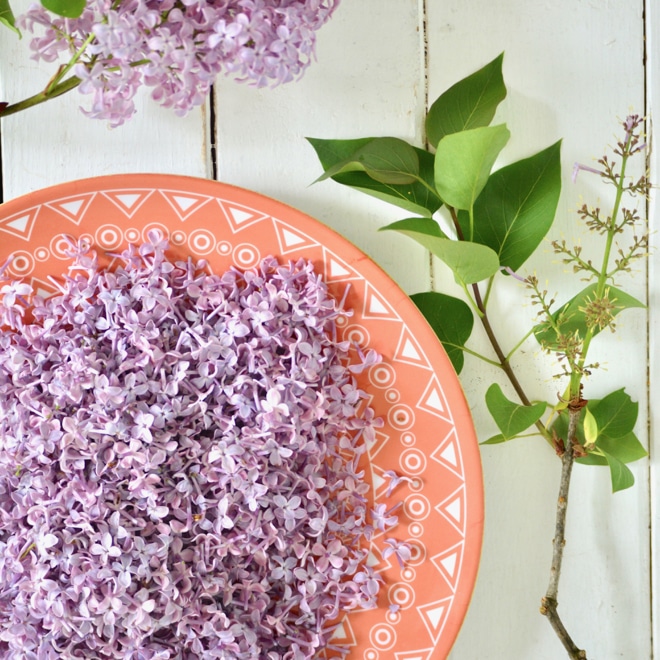
- Separate lilac blooms from the stem, leaving the pistil and sepals behind. It super easy. Just give a cluster a gentle tug and the blooms will slip right off.
- Boil equal amounts of water to however many (tightly packed) cups of blooms you’ve picked and separate. So if you have 2 cups of packed cups of blooms, boil 2 cups of water. This would be the least amount I would recommend. It should yield just a little shy of a pint’s worth of syrup. (Today I started with just 1 cup of water, and the yield was the amount you see pictured below.)
- Remove boiling water from the burner and stir your lilac blooms into the water, along with a small handful of frozen blueberries if you would like a romantically deep purple color to your syrup (otherwise, it will be light greenish lavender tinted color). Then replace the lid, and let it steep a minimum of 10 minutes. I sometimes let it sit there for hours until it’s long cooled down.
- Squish the blueberries with a spoon, releasing every last drop of purple hue into the water, then strain the berries and blooms out of the water and put them in your compost bin.
- Add equal amounts of sugar to your purple lilac water as however many cups of water you started with, so, add 2 cups of sugar if you started with 2 cups of water and 2 cups of packed lilac blooms.
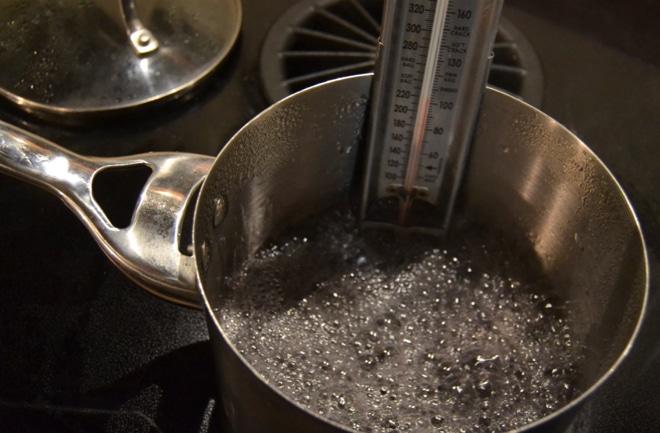
- Return the sauce pan to medium high heat and stir continuously until sugar is completely dissolved.
- Place a thermometer in your pan, stir occationally, and never take your eyes off of that thermometer (says a sugarmaker who has burned way too many pans of syrup). In reality, it will probably take about 15 minutes from this step to the next, but honestly, you just never know.
- When the thermometer reaches 219 degrees (or exactly 7.1 degrees above the boiling point of water where you live), you’ve reached lilac syrup perfection. Or anytime the syrup is the thickness you want it, which honestly may be closer to the 200 or 210 degree mark. It’s your syrup. They’re your pancakes. To quote that fast food chain that entices kids with cool paper crowns and autonomy, “Have it your way.”
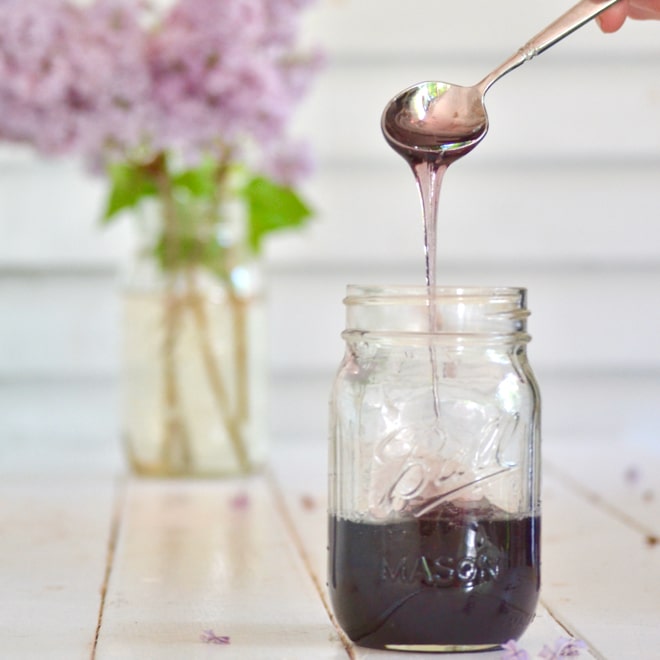
- Immediately pour lilac syrup into cleaned and sterilized pint jars (aka jars you washed in the dish washer), top with lids you boiled in hot water and rims that you seal very tightly, then keep jars in a draft-free area, covered with a towel, until the lids seal. (No need to water bath can this syrup, since it reached such high temperatures and then you sealed it at that high temperature.)
If you’d like to know more about lilacs, you’ll love this little gem of a post.
If you’d like to know more about harvesting and making MAPLE syrup, start here.
EDIT TO NOTE: A big downside to this syrup? It crystalizes after you store it in the fridge. It’s still usable; simply heat it over medium heat, stirring, until the sugar crystals dissolve and then serve it warm. But I’m not a fan of the extra effort, plus pure maple syrup is my preference for slathering on my pancakes. So I doubt I’ll be making lilac syrup this way again. Instead, I’ll stick to lilac simple syrup, which is amazing and keeps, in the perfect consistency, for a very long time.
Go here for the full scoop on making–and lots of ways to USE!–lilac simple syrup.
If you have a lilac bush, be sure to read up on these 4 simple tips every lilac owner needs to know–tips from a professional horticulturalist who offered some great wisdom here, on SoulyRested, recently.
Pin this for later!
Click on the image below to pin this post.

Many readers often ask what camera I use to take the images you find here on SoulyRested. I love my Nikon; you can read more about my camera on my Resources page and even purchase your own here.
Glance at my Resource Page if you’d like to get a glimpse of all the supplies I use and recommend for everything from gardening, to homeschooling, to chicken care, to nature journaling, to maple syrup making.
I’d love to connect!
To find me in some other neck of the woods, just click any (or every!) icon below:


And please follow along!
Please take a second to follow along here on SoulyRested to catch up on a few of my memorable mishaps, discover fascinating things about my centuries-old farmhouse, glean a little parenting/homeschooling insight from this momma who’s been failing at the effort for almost 2 decades, or enjoy the inside scoop on the secrets other legit homesteaders might not tell you.
I hope my focus always encourages you, because simple joys require hard work. Let’s face it, we all need all the encouragement we can get! As soon as you subscribe (in the box at the end of this post), you’ll have immediate access to my Resource Library, which includes many useful printables–including ones about crafts and how to clean a braided wool rug–my FREE EBOOKs, and amazing recipes for things like whoopie pie cookies, maple sap switchel, and my grandmom’s perfect pie crust.
If you already ARE a subscriber, you won’t see a box below, cause you can just hop over to the Resource Library here and enter your personal password. (If you don’t remember your password, no fear, we always include a personalized reminder in every Thursday email, “Hard Work, Simple Joys.”)

Ooooh, this sounds SO good. I love my “light and fluffy pancakes” and they’d be even better with some flower syrup on top! So you say I can make it with other blooms too? I might try it with rose petals the next time I have a flush of blooms. Thanks for sharing!
Pingback: 40+ Lilac Recipes