
Last Updated on January 8, 2025 by Michelle
I’ve been slowly, over the past decade, working towards a more sustainable way of gardening and cover crops have been an important part. Today I’m sharing all the details, to help you do the same.
These cover crops are hands-down my favorite.
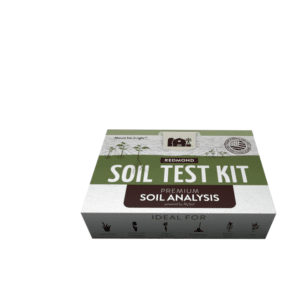
But the first step was using this amazing soil test (read that story here and how I almost lost my garden), with helped me recognize the huge deficiencies in my soil that I was misdiagnosing and treating incorrectly for years. I am in love with this particular soil test because it is genuinely easy to understand your results (no agricultural degree required) and it offers suggestions for solutions to any problems your soil might have.
Then I found an organic soil amendment that gives an all-natural spark to the soil, with amazing results, and an organic fertilizer (I couldn’t believe how much more my garden produced when I applied both of these, the first in the spring and again in the fall and the second I applied weekly).
And, over the last few years I’ve been dabbling in the idea of cover crops and learning a lot as I experimented.
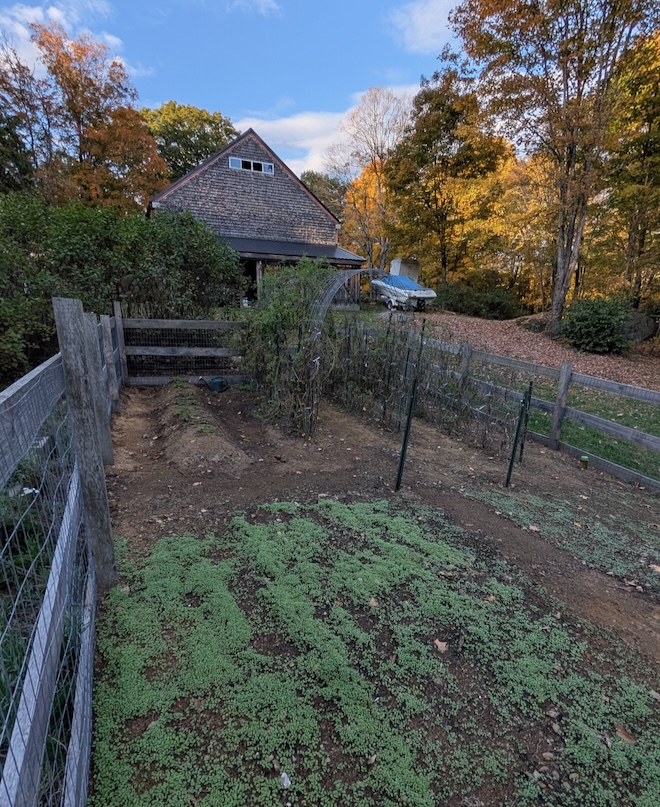
A cover crop in a home garden
Any resources I would refer to on cover crops seemed to all be written for a large-scale farmer.
So I decided the world needed an Ultimate Guide to Cover Crops in Small Gardens.
You, my friend, have stumbled upon my little guide, and I hope it helps you tremendously. I hope it helps you to learn more about sustainable gardening practices. I hope you see how cover crops improve your soil’s minerals and nutrients. I hope you witness cover crops loosening your soil’s compactness and improving excessive erosion issues.
But most importantly, I hope this Ultimate Guide to Planting a Cover Crop in a Home Garden helps you grow more nutrient-dense food for your family. In the end, that’s what it’s all about.
Well-cared for soil feeds your plants well, producing the best food, and enriching your family’s meals.
So let’s dive into all things “cover crop” for small gardens…
What are cover crops?
Cover crops are fast-growing plants—legumes, grasses, and brassicas—that are planted in late summer or fall, when areas of a garden have stopped producing well for the summer.
Behind the scenes, in your garden’s “down” time, these cover crops are busy doing the hard work. They’re improving your soil’s health, adding important organic matter back into your soil, and–by doing that–improving the very structure of the dirt and making it more fertile.
Cover crops will give you not only more nutrient-dense food, but also a higher yield and a healthier eco-system in your soil, feeding the micro-organisms and worms.
Go here for more about how you can know the current quality of your soil: Is Soil Testing Important for your Garden?

Is a cover crop in a home garden worth it?
Many large-scale farms will allow areas to grow fallow, with cover crops, for an entire growing cycle, but for a backyard gardener this isn’t usually possible. If this would require you to give up too much space that you need for growing each summer, take heart. I’ve been growing cover crops for years and doing it in such a way that I haven’t lost any growing area, any year.
More on this in a minute.
Types of cover crop for a home garden
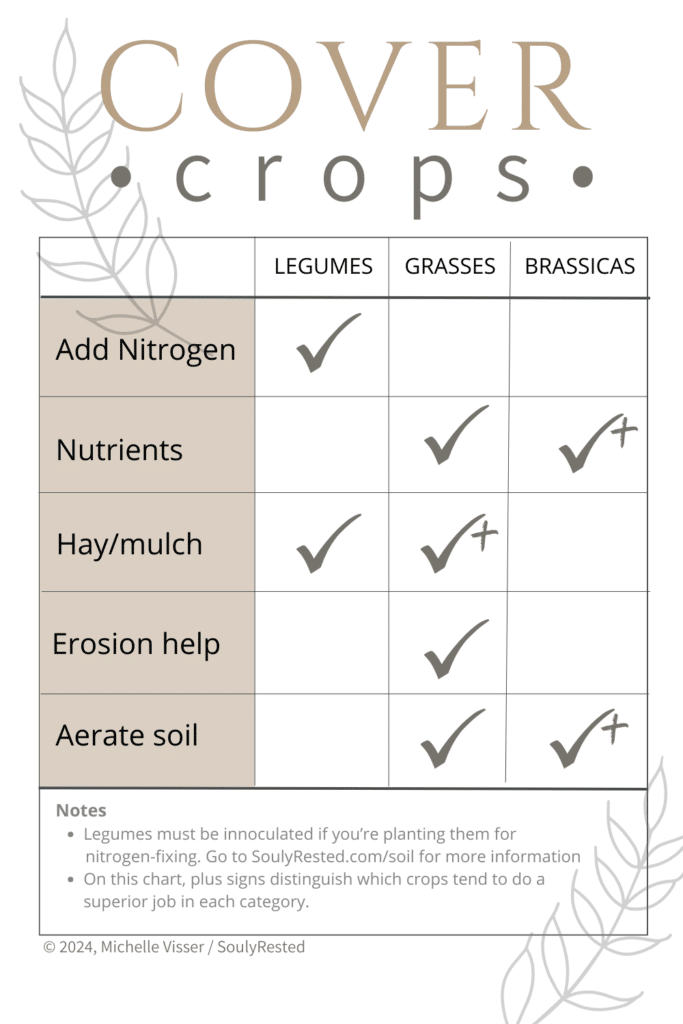
There are three basic families of cover crops, and they each offer specific benefits and challenges. (Yes, as much as I believe in them, I will admit that cover crops do come with some disadvantages too. More on that below.)
These 3 groups don’t include every option, but it’s close and it helps to look at the big picture–of 1,000s of options–in a small number of categories when you’re choosing which crop to grow when you’re planning to use cover crops on a small scale.
I’ve done my best to simplify these 3 categories and their benefits on the chart below. In areas where 2 crops both do a nice job, I’ve added stars to the crop that, in my opinion, tends to outshine the other and I’ve explained why below, in each crop’s description.

Brassicas as a cover crop
Benefits of this group of cover crops?
My favorite cover crop in this category?
Things to know about this cover crop?

Grasses as a cover crop
Benefits of this group of cover crops?
My favorite cover crop in this category?
Things to know about this cover crop?

Legumes as a cover crop
Benefits of this group of cover crops?
My favorite cover crop in this category?
Things to know about this cover crop?
Legumes can also provide a sort of “green manure,” or a “living mulch,” which protects your garden from erosion and even helps next year’s plants thrive by holding moisture in the ground for the plants’ roots and preventing weeds in next year’s garden. Your plants will be able to thrive without the competition of the weeds, which will often win the battle over your garden plants for sunlight, nutrients, and water if they’re allowed to co-habit in your garden with your food.
In the end, legumes have proven to be my personal favorite cover crop. Ironically I didn’t award them a “plus sign” on my cover crop chart above, but that’s only because no other cover crop can even do what they excel at, which is nitrogen fixation, which honestly is a garden miracle in my book. But there is one caveat that I didn’t know when I first planted legumes as cover crops, and it cost me. So keep reading.
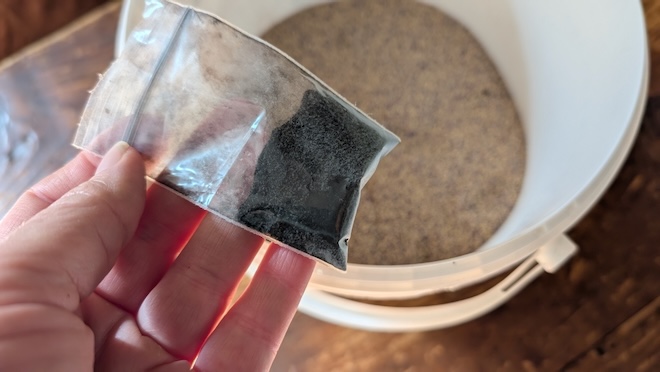
How do you inoculate legume cover crops?

How to plant a cover crop in a home garden?
When to terminate your cover crop in a home garden?
It can be a little hard to understand when a cover crop is ready to work into the soil. Just keep in mind that a plant is storing up nutrients right through the point when it starts to bloom, and you won’t have any trouble knowing the most ideal time to turn over your cover crops. Once the cover crop has started to form buds and will soon be going to flower, it’s at the peak of the benefits it can over your soil.
Also, if you let your cover crops to to flower you are risking that the plants will drop seeds and cause you a mess of unwanted “weeds” growing in your summer garden.
Mind you, you may not have time to let your cover crops mature to this point. If it’s time for you to plant your garden, you need to remove your cover crops. In most cases you’ll actually need to do this a week or two before planting, so often my crops aren’t at their peak nutrient quality, but that’s okay, they’re still adding wonderful food to the microbiome of my soil.
How do you terminate your cover crop in a home garden?
This is the part that stumped me for the longest time. Honestly, I put off even trying to grow cover crops for years because I couldn’t understand this very idea. But it’s so much easier than I thought. In fact, there are lots of choices, and they can be used hand-in-hand as well. So I choose the method that works best for me, my particular garden, and what I want to plant next spring.
First of all, keep in mind that you don’t want to kill your cover crops until they develop enough organic, usable material to nourish your soil. This plant material (above and below the surface) will break down and become the nutrient-rich soil you’re aiming for.
Let’s go over the 6 main ways to terminate your cover crops:
1. Weed whacking cover crops
Obviously, large amounts of plant material is great for nourishing your garden, but it’s not so great to have to kill on a large scale every spring.
To help with the termination process, the first year that I experimented cover crops, I planted very sparingly. But the following year I knew I wanted even more nourishing plant material for my garden in the spring, so I scattered my cover crops very densely.
Since densely planted crops are very time consuming to turn over, I found that weed whacking them first helped a lot that year. This step will, of course, leave resilient root systems to continue growing, so this step is very seldom a stand-alone method. But when you pair weed whacking with another method, such as turning over or tarping, it works well.
If you’re planting well-established seedlings, you might find you can simply clear, by hand, small areas within your weed whacked cover crops for planting each seedling. The success of this method really depends on how established the root system is of your cover crop.
If your garden is a large field, you could of course use a tractor or lawn mower for this step. But average-size gardens and raised beds do well with a weed whacker.
Be sure to not let your cover crops grow too tall before weed whacking them, or it becomes very difficult.
2. Turning over cover crops
Turning crops over, or tilling them, is the best way to kill cover crops. It significantly injures the plants, pulls up the root system, and leaves the dead plant matter where the microorganisms can feast on it and break it down pretty quickly.
It usually takes very little time to do this if you weed whack your crops a few weeks before this step.
If you’re terminating crops in a raised bed, you might find this is easiest with a turning fork.
3. Winter-killing cover crops
Winter-killed plants are tender to freezing temperatures and can naturally be killed by cool winter temperatures. This is definitely the easiest way to terminate your crops, because it requires no work at all on your part in the spring. But this method isn’t effective, of course, if your cover crop gets planted too late in the fall. If your crops don’t have enough time to grow very much before frost arrives, you won’t be adding much, if any, plant material to your soil.
If, on the other hand, you plant your tender crops in late summer, the dead plant matter that results in the fall will create a mulch-like mat on top of the soil, which is great for reducing soil erosion. In the spring, simply rake away your “mat” and voila, you have a clean, weed-free plant-able garden.
I will use this method whenever I can (which isn’t too often in our short New England growing season). When any garden crop dies off in early to mid summer (often this is the case for my lettuce, and sometimes it happens if a predator has destroyed a section of the garden) I immediately plant mustard–my favorite winter kill cover crop.
4. Knocking over cover crops
This is sometimes called “crimping,” but it’s truly as simple as knocking over your plants. This isn’t so much of a stand-alone termination method as it is one to use hand-in-hand with other methods, often used as the first step in tarping or solarizing. If you use using a tool that scratches up the plants as they’re flattened (a roller-crimper or power harrow), you’ll get the best results and you’ll shorten how long you need to keep the crops covered with a tarp as well.
5. Tarping cover crops
A large tarp over your cover crops works well at killing the plants, if you have a few weeks time to let the process happen before you want to plant your spring seeds or seedlings. You will simply need to lay the tarps over your cover crops and place weights (like old bricks or cinder blacks) on your tarps.
Tarping works well by trapping heat, blocking light, and stifling airflow. These 3 things work together to kill your cover crops, usually within about 2 weeks, but of course this will be longer if you have cold temperatures and cloudy days (both of which are common in my gardens in the spring, here in NH). The cooler the temperatures, the longer your crop will need to be covered before it dies.
If your temperatures are below 50, you will need at least 3 weeks for this method to work, which means on most years it’s not an effective way to terminate cover crops in the short New England growing season.
6. Harnessing solar power to kill cover crops
If you tarp your crops with a clear sheet of plastic in the early spring you’ll create a greenhouse effect that “bakes” the cover crop faster than the tarp method. I don’t choose this option for two reasons. First our spring summer here in NH isn’t usually strong enough for this to be effective but second, and more importantly, if you leaving a cover crop in this greenhouse effect for too many days you might sterilize your soil and kill many important soil microorganisms.
But this method can work, if you’re cautious and don’t absentmindedly leave your cover on for too long.

Do you pull out cover crops?
I never recommend totally pulling out cover crops and disposing of them in the spring. Instead, I recommend tilling them into the soil, to add all those nutrients that the cover crops have been making back into your soil.
What is the fastest growing cover crop?
While I certainly haven’t tried all of the thousands of cover crop options, I can tell you the fastest one I grow is mustard, specifically this mustard blend. Mustard gives a rapidly growing amount of nutrient-filled plant material to your garden. While it isn’t a nitrogen fixer (read the legume section above for more details about that), it is a nitrogen lifter, and it will work at bringing any nitrogen that does exist in your soil within reach of your plants. It’s also good at suppressing weeds, so it gets a place of honor in many of my gardens every fall.
How long does it take for cover crops to work?
I read recently that the commercial fertilizer options like 10-10-10 take years to fully make any difference in your plants. One genuinely beautiful thing about cover crops is they start making a difference immediately and keep making a difference for the entire year ahead and beyond.
On the other hand, cover crops, like this amendment that I also highly recommend, are an all-natural soil amending progress. They will do a great job for your soil, but at a natural pace. Changing what’s happening below the surface requires patience. Eventually, you will achieve a sustainable, thriving ecosystem for your home garden crops. Microbial life will show up in your soil quickly, but the full potential of your soil’s fertility will come to life after multiple seasons of good care.
Can you plant directly into cover crops?
You can, potentially, plant well established seedlings into your cover crops, after partially terminating them. Read more about that in the terminating method descriptions above.
What are the disadvantages of cover crops?
While I’ve found the advantages to outweigh the disadvantages of cover crops, I will never deny that there are indeed disadvantages.
Cover crops can:
- Shorten your growing season. You may find yourself pulling out summer crops before they’re totally done producing in order to give your cover crops more time to reach maturity before they need to be terminated next spring.
- Work better for gardeners in the south, with longer growing windows of time. But even in our northern climate, I find the cover crops do indeed have enough time to make a nutrient difference in my soil, even though I often don’t have enough growing time for the cover crops to reach maturity.
- Lead to a future “infestation” of sorts of your cover crop plants in your next summer’s garden if you aren’t careful to terminate the cover crop before it goes to seed. If you are sure to kill the cover crop before it blooms, you won’t have this problem.
Talk to me about your cover crops
If you have any questions, leave a comment below. And please tag me on ig to show me which cover crops you’re planting @souly.rested.
My Favorite Ways to Improve Garden Soil


Find out why SoulyRested was considered to be One of the Top Homesteading Blogs.
Glance at my Resource Page if you’d like to get a glimpse of all the supplies I use and recommend for everything from gardening, to homeschooling, to chicken care, to nature journaling, to maple syrup making.

I’d love to connect!
To find me in some other neck of the woods, just click any (or every!) icon below:


Pingback: Tractor Crimping Excellence: A Professional Guide » EngiMarket
Pingback: Natural Crop Termination: Expert Guide to Roller Crimping » EngiMarket
Pingback: Rolling Crimper Success: Methods That Build Better Soil » EngiMarket
Pingback: Food Plot Excellence: Master the Art of Crimping » EngiMarket
Pingback: Expert Methods: Roller Crimping for Cover Crop Success » EngiMarket