Last Updated on June 20, 2024 by Michelle
Want to know how to build your own Reverse Osmosis for making maple syrup?
Want to save money making maple syrup?
Every detail you need to know is all broken down for you right here.

I’m elated that you found this page. If you’re a backyard sugarmaker looking to save money, this article will make your day, just like it did for Jeff Whitmore and Eric Shufelt:

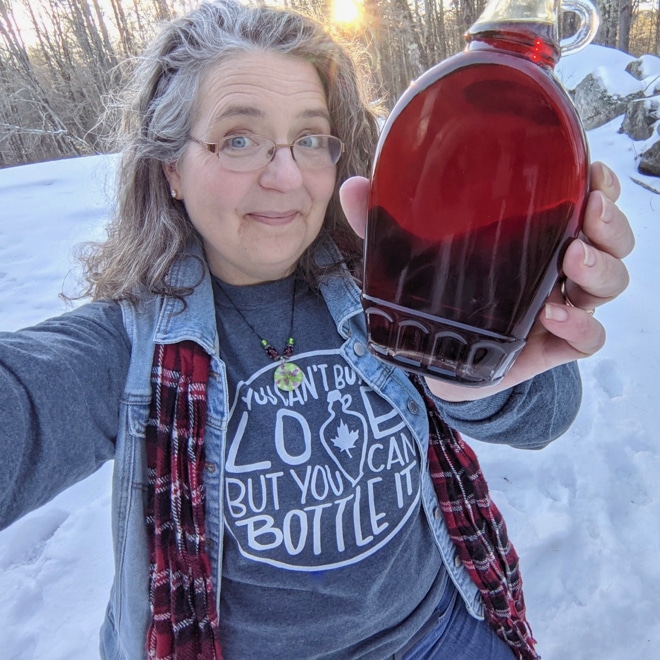
Hi, I’m Michelle. A backyard sugarmaker in New England, and author of Sweet Maple.
Please consider helping me support sugarmaking education worldwide with every purchase of SoulyRested Swag. You’ll find the latest designs right here (like the one I’m wearing here) .
But first, let me applaud you. Seriously. I have huge respect for DIYers like you who know what they want and can seriously build it.
I’m not like you. I love making syrup, and baking with syrup, making maple cream (my favorite form of maple), and writing about maple syrup, but I do not know how to build something like this awesome Reverse Osmosis set up that we have.
Nope, that’s all my husband’s ingenuity. And I have huge respect for Bill and for YOU, since you’re here.
Me? I wouldn’t know how to even cut the plywood the size I wanted it. True story.
Can you save money making maple syrup?
The best way to save money making maple syrup is to cut down your boil time, and save in your fuel costs. The best way to do this and save money making maple syrup? By building a Reverse Osmosis system for maple syrup. And that, my friend, is exactly what this article is all about.
Yep, you’ve stumbled across the Holy Grail for saving money while making maple syrup…
What is Reverse Osmosis for maple syrup?
A Reverse Osmosis system (lovingly referred to as “RO” in the sugar making world) is the same idea as that fancy filter many folks have under their sink, filtering their water.
But a sugar maker reverses the system, and instead of filtering out impurities to produce pure water, we filter out the water and keep the “impurities,” aka SUGAR. By removing a nice percentage of the water in the tree sap, we increase the brix of the sap and reduce our boiling time.
Read more about measuring brix in your sap and syrup here.
Save money and build a DIY Reverse Osmosis system.
So I asked Bill to walk me through exactly what he did to make this sweet contraption. Since it saves us hundreds of dollars every year in fuel costs as we boil our sap, I totally want to tell y’all exactly how to build your own.
I also list, below, every single item Bill bought to build our system.
If you are still learning how to collect, boil, and bottle maple syrup, head over here to this article about making syrup, step-by-step or, better yet, pick up a copy of Sweet Maple. It’s being hailed at the “Book of Knowledge of all Things Maple.”
But maybe you stumbled here wondering what an “ro system” is, I’ll explain…

What is a homemade reverse osmosis (RO) system?
A DIY Reverse Osmosis is exactly like a water filtering system. You know the ones that that filter out the impurities and leave you with wonderfully pure drinking water? (In fact, you’ll see below that’s exactly what we’re using–filters from a water purifying system.)
Except sugarmakers use the idea in reverse. We filter out the “impurities” (aka the sugars in the sap) and keep them. That’s what we boil down to make syrup. But after the sap has run through the ro system, we can spend a lot less time, energy, and fuel to boil it. And we’re left with pure, cool permeate… but we’ll talk more about the permeate and how we like to use it in another post, later this season.
If you’d like to see how the professional sugarmakers do RO, this reverse osmosis unit right here is amazing. (And here’s a facebook live video showing how it works.) Maybe some day we will upgrade to that fancy-shamancy gorgeous thing. But for now, our little homemade one gets the job done.
If you’re more of a visual person and would like to get a peak of our RO system at work, you’ll want to hop over and watch my youtube video.
Does Reverse Osmosis remove sugar from your sap?
No, reverse osmosis doesn’t remove sugar from your sap. In fact, the reason we want to run sap through an RO is the exact opposite. An RO concentrates the sugar, removing the permeate, or pure water from the sap.
By concentrating the sugar in the maple sap, a sugarmaker can save as much as 90% in fuel since he or she will have to boil the sap for a much shorter time. Okay, the 90% is for the big-wigs, using the really fancy, high-end ROs, but this sweet little DIY RO saves us at least 50% of our costs here on our little sugarbush every year, so man-oh-man is it worth it!
Can you run sap through RO twice?
Yes! Not only can you run your sap through your RO twice, but I highly recommend it!
You’ll save yourself that much more on fuel costs to boil down your sap, since you will have doubled the amount of water you’ve removed, but you also may notice a slightly more caramelized taste to your syrup. That’s a win-win in my book.
Does a DIY RO system really save money?
Our family lives on 14 wooded acres, and we cut and store a lot of wood. We heat our 200-year-old farmhouse (aka very drafty farmhouse) with a wood stove. All winter. All very-long-cold-New-England winter. There just aren’t enough hours in the day or trees in the woods to do it all. So we persoanlly choose to boil our sap with propane.
But whether you’re a backyard sugarmaker who uses propane or wood for fuel, a homemade ro system will save you a boatload of time and money. (Read about Ray Ingham’s ro experiences below.)
Afterall, we all wanna save on fuel, no matter where were get it, can I get an “amen”?
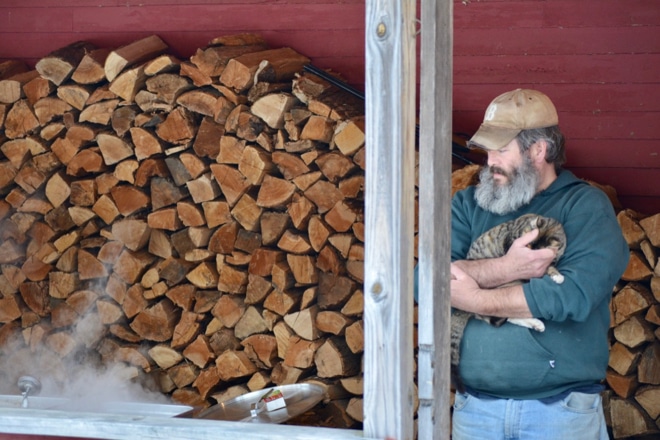
Of course, no matter what you use for fuel, cuddling with a barn cat while you watch the sap boil makes everything a little more puuurfect. (Sorry, bad pun.)
If you wanna read more about why we RO, go here. Wanna know how we even do some natural RO for FREE? Read this article right here. Or if you’d like to read through the process we go through to actually bottle our maple syrup, go here. Otherwise, read on…
Is it hard to build a DIY Reverse Osmosis system?
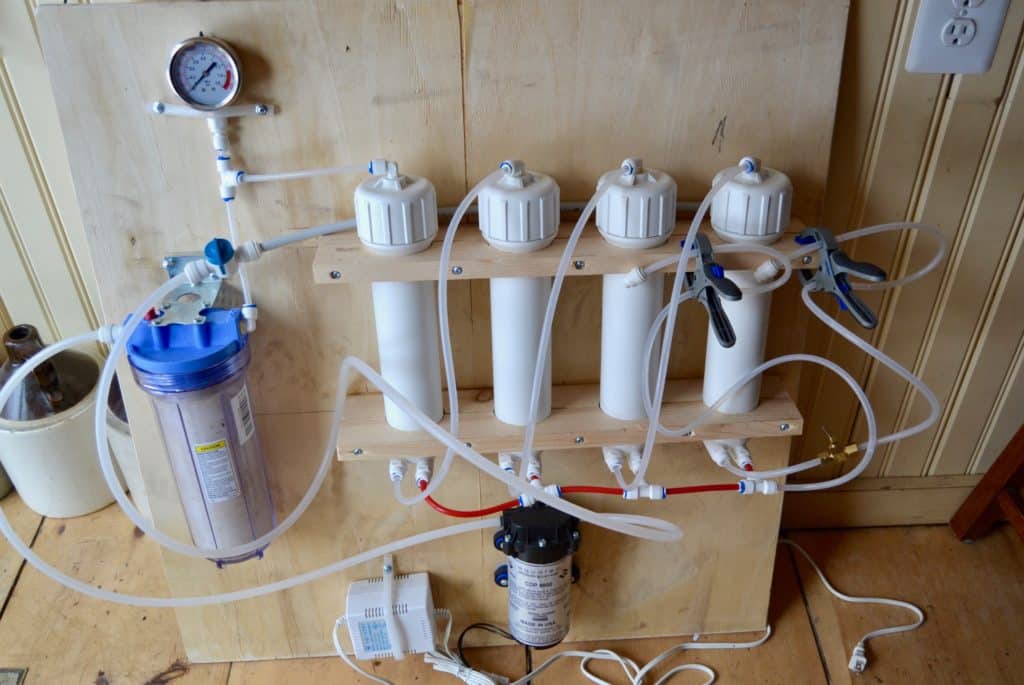
Here’s our Reverse Osmosis set up. It’s rather simple, it’s rather small, but it’s totally huge on savings.
How long does it take to build your own Reverse Osmosis (RO) system? Honestly, getting all the pieces is the largest drain on your time. Once you have all the parts in front of you, it’ll take you a few hours, tops. Well, that is if you’re like Bill. If you’re like me. . . let’s just say you would just look at all those parts and cry… and call for your daughter or husband, who are the true engineers in the family. . . then go bake some maple cookies while they do the hard work. (If you need a giant cookie fix–and I do mean giant–you’ll want this recipe.)
How long does it take for a 5-gallon bucket of sap to go through the system? We use filters intended for 150 gallons per day, and 5 gallons goes through in about 45 minutes.
At what pressure do we run our RO? We run it at 60-70 psi, which we regulate with the needle valve.

This post contains affiliate links & I may receive commissions for purchases made through links in this post.
Go here to read the full (ultra fun) legal disclosure about that.
To build a reverse osmosis set up of your own–and seriously slash your fuel costs–you’ll need a piece of plywood, or something similar, for mounting everything, and you’ll need the following items, which are all pictured below as well, in the order they’re listed. Click either the item name or the picture for ordering information.
Then keep scrolling for a totally unprofessional, hope-you-understand-what-he’s-talking-about drawing of Bill’s design.
The items we used for our DIY Reverse Osmosis for making syrup
Pump and transformer, membranes* (you will need 4 but see other links for varying gallons per day), membrane casings (4), filter 4-pack, filter housing, pressure gauge, a straight needle valve.
* For your membrane, you can choose the one linked above, for 50 gallons per day, or upgrade to one for 100 gpd or 150 gpd. (We use the 150 gpd filters. We have 110 taps and process roughly 5 gallons of sap through the RO every 45 minutes.)
btw, if you don’t already have Amazon Prime, I highly recommend it. We live in nowhere-ville, so traveling to Lowes is quite a trek. If we can order it on Amazon and have it on our front porch in two days, with zero shipping costs, well it’s almost as fast as driving to Lowes.
But seriously, you can try out Prime for totally free for 30 days. If nothing else, sign up and get all these goodies delivered to your door for free shipping, right away, so you can start saving money on your propane.
Try Amazon Prime 30-Day Free Trial by clicking through this link.
You’ll also need some tubing and connectors, as well as another valve. These items, which I couldn’t find on Amazon, I list below, along with where I did find them and the item #s or purchasing info you’ll need.
The items we picked up at Lowes for our DIY Reverse Osmosis system
1/4″ T (you’ll need 4 of them) Sharkbite item # 835039, model #25427Z
1/4″ male x 1/4″ quick connect 90° (you’ll need 5 of them) Sharkbite item #83500, model #25433
1/4″ male x 1/4″ quick connect straight (you’ll need 8 of these) Sharkbite item #835025, model #25413Z
3/8″ x 1/4″ male quick connect (just 1) Sharkbite item #835028, model #25416Z
3/8 polyethylene tubing (25′ of it) item #879277, model #98634
1/4 polyethylene tubing (25′ of it) item #814305, model #98584
3/8″ quick connect ball valve (just 1) Sharkbite item #835049, model #25438Z
ridgid 3/8″ x 30″ pex tube (30″ faucet) item #751655, model #7227-30-38-2
Here’s the artwork I promised you.*

*NOTE: the red lines in Bill’s drawing represent clear tubing connecting the filters in sequence above. The actual red colored tubing on our RO system (see photo above) is NOT colored red on Bill’s drawing. Sorry if that is confusing. Bill confuses me sometimes too. 🙂
How much water does reverse osmosis take out of maple sap?
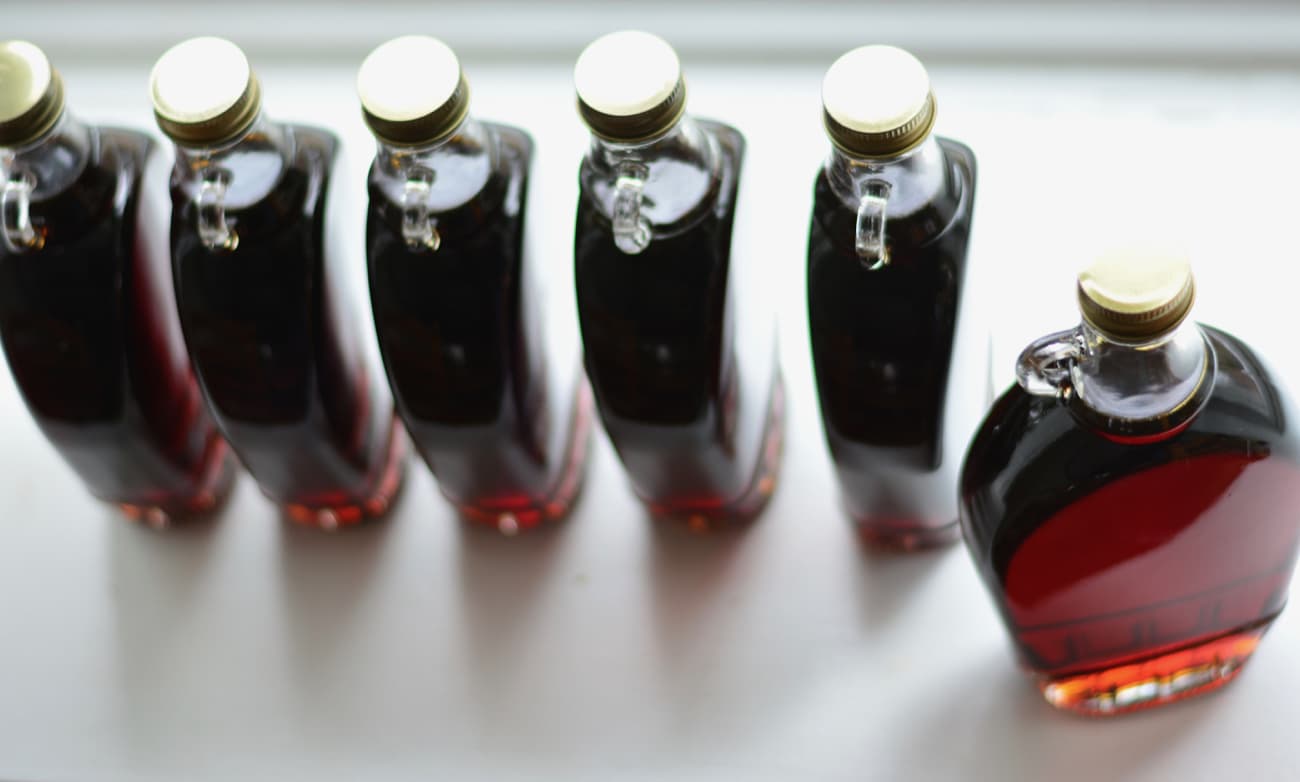
In the end, a DIY Reverse Osmosis system will take a lot of the water out of your syrup. We typically run our sap through a few times and get our sugar concentration up to about 8% (vs. the 2% we start with). We’ll take 100 gallons of sap down to about 40 gallons of sap before we start to boil it into syrup.
If you want to know more about choosing a refractometer that will help you measure your sugar levels of your sap so you know how much more concentrated your RO system is making your sap, read & watch the video here about How to Make Syrup–what tools do you need?
Is Reverse Osmosis worth it for maple syrup?
Yes, the afternoon or two that it will take you to build a DIY Reverse Osmosis system, and the money you invest into the parts will absolutely pay you back in the long run. Depending on how many trees you tap, it will most likely pay for itself in just a few years.
Read a few reviews of this system below to see the return on investment others are reporting. It really is a great investment that pays off quickly.
What are people saying about this DIY RO system?
Mark & Colleen Falardeau, backyard sugarmakers who built this RO system, explain,
“It cost us roughly $300 to make our RO and it takes sap from 2-3% sugar content to 7-8% in one pass! We have 100 taps and the wood saved and time saved in one season has made it worth every penny!!“
Chris M. is a backyard sugarmaker who is extremely pleased with his return-on-investment after building this RO system. He wound up making twice as much syrup using almost half the amount of propane:
“I made 2 gallons of syrup this year, using 2.5 tanks of propane. How does that compare to my costs last year? Last year, I made about 1 gallon of sap and used 4(!!!) tanks of propane. That is insane return on my investment!“
Ray Ingham is a hobby sugarmaker in Huntington, Vermont. Ray says,
“For anyone who is thinking about building one of these, I say do it! I put one together last year using 4 100 gpd membranes. It cost me about $350 and was well worth it. I’m retired and a one-man band. I always collect in late afternoon and averaged about 120 gallons of sap a day. I would run the RO over night and extract about 7 gals. of pure water an hour. By morning I would have 30 – 40 gallons of sap to boil down. My sap went from 1.5% sugar to 4 to 5% sugar after running through my ro. I would boil this down in less than 3 hours in my 2×4 pan. I saved a incredible amount of time and firewood.”
Heather Gilson, whose family has about 50 taps in their backyard on any given year, explains,
“My husband built one last year and man was it a time saver for us!! We saved so much time in not splitting a bunch of extra wood, not having to boil for extended periods of time. It was amazing!”
How do you clean RO membrane for maple sap?
You’ll be surprized at how easy it is to clean your RO membranes and use them for many seasons.
To clean the membranes after each use: Simply run your permeate (the water that your system pulls out of your sap) through your system at the end of your day. That will be all the membranes need to be clean and ready to use the next day.
To clean the membranes at the end of the season: Simply remove your membranes and wash them under running water thoroughly. Place them in a ziploc bag and store them in the back corner recesses of your refrigerator until the next sugar season.
More syrup-related information:
How to use pumps to make your sap collection so much easier
My detailed list of all the best tools for a backyard sugarmaker
Make some amazing Maple Cream with your syrup
You can also follow my Maple Syrup pinterest board right here. Everything I ever write about maple gets added to that one board.
Taste and see that the Lord is good. Psalm 34:8
Pin this for later!
Click on the image below to pin this post.

Find out why SoulyRested was considered to be one of the One of the Top Homesteading Blogs.
Glance at my Resource Page if you’d like to get a glimpse of all the supplies I use and recommend for everything from gardening, to homeschooling, to chicken care, to nature journaling, to maple syrup making.
I’d love to connect!
To find me in some other neck of the woods, just click any (or every!) icon below:


I’m interested in making an RO machine from the plans you show here. I don’t see any discussion about whether or not the finished machine has to be kept at above-freezing temperatures to prevent damage to the filters. Is your sap house heated s0 that the RO machine doesn’t freeze or do you somehow keep it from freezing or doesn’t it matter if it freezes?
I’m a retired guy who has made between 10 and 15 gallons of syrup annually using an open pan and LP gas as a heat source. I’d sure like to reduce my energy cost. I think it now costs me almost $30 per gallon in LP to make.
Thanks so much.
Hi Dick. What a great question. Funny you think we have a sap house… boy wouldn’t THAT be nice!? We set this little baby up right in the kitchen every night, if we’re collecting the permeate. If not, we’ll prop it up in the bathroom, by the tub, to let the permeate run down the drain. (I’d love to keep it all.) So we’ve actually never tried to run it in an unheated area. Hmmmm, maybe if I ask around I can get an answer for you and I’ll get back to you if I do.
Hi Michelle,
Found your website while investigating maple syrup processing, found your RO system and proceeded to order all pieces you you have linked, now waiting for one more piece. Your tubing from the sap to the pump and then pump to filter you
have 3/8 there in the wonderful diagram and I’m guessing that the rest of the tubing is 1/4. The inlet and outlet on the aquatec pump connections supplied by manufacture are 1/4 and the 3/8 tubing doesn’t fit into the opening. Do I need to find couplers to change to 3/8 or can I just use 1/4 for that part. After filtering when do I need to process. Sap is running in SE Wi. so am excited to get this up and running. Thanks for your info
Oh, boy, any technical questions I have to run by Bill. I literally know nothing about this unit aside from what you read here. 🙂 I’ll try to remember to get back to you! But I can absolutely answer your second question. After running your sap through your RO (you can run it through twice if you want) you want to IMMEDIATELY process it. Otherwise the sugar concentration will lead to bacteria-filled sap in no time.
Hi Mike, I built mine last year(2021) and ran into the same issue. The 1/4 inch tubing works fine into the pump, no need to convert. The only problem I run into is getting the pump primed and pulling in the sap, but a little elevation does the trick!
Good Luck…this a great little unit and has saved me so many hours of boiling. Thank you Michelle & Bill for sharing this information!
Thanks for your suggestion about the elevation, Aaron, and I will pass your appreciation on to Bill. 🙂 So glad you’re finding it helpful.
Part of the problem here is describing the tubing. For us clueless folks, it is important to always describe tubing with BOTH the ID and OD, like 1/4″ ID / 3/8″ OD.
Hi Michelle, I was setting up my RO. I only have 3 100 gpd membranes as one is on back order. I hooked it up with the three I have and was getting 1% sugar in my permeate. Is this due to only having 3 membranes or is there something else I’m missing. My concentrate was sound 4%. Its was 2% to start with. Thanks in advance.
Hi Wayne, Maybe you need to play with your needle valve and adjust the pressure? If it’s not a high enough pressure grains of the sugar will clog the holes in the filter and make your RO much less efficient.
Michelle, fyi my issue was a bad membrane. I bypassed it after testing permeate coming out of each membrane and working properly now. Thank you.
I had mine set to 80 psi, and though it took a lot longer to process 5 gallons, I got a lot of water out in one pass. Also suggest using snap fit valve that are made for plastic tubing rather than needle filler. I always had leakage issues wirth brass needle valve. No leaks whatsoever this year
I am hoping to make one before this year’s season! I can’t wait to hear what you do with the permeate, and or what you use it for!
thanks for putting this down for people like me!
You are very welcome Jill… just 4 years ago I was “someone like you” and needed all the help I could get. 🙂
So interesting!! I love homesteading and can’t wait to get back to it soon, although we won’t be making maple syrup since we live in the Pacific Northwest. 😊
Clarissa–you may be shocked to know that in the process of writing Sweet Maple I have talked to numerous folks in the Pacific Northwest who very successfully tap trees and make syrup!! Seriously. Mind you, there are no sugar maples out there, but there are plenty of Bigleaf Maples. Winter storms coming in off the ocean cause such drastic changes in weather fronts that trees gush sap even when temps never dip below freezing. Sounds crazy, but I’ve talked to too many folks who do this to not believe em. 🙂 Look up a group called the Vancouver Island Sapsuckers
That is really clever! Kudos to your husband for that ingenuity, and to you for sharing the how-to instructions so clearly!!
Thank you Michelle. It’s been a 2-year process pulling this all together.
I love the way you do things here! 😀
We live in the Deep South. I’m pretty sure sugar maple trees would grow here, but in zone 8, would they make syrup? Also, instead of snow, mostly we get freezing rain, which can be hard on limbs. Do the limbs of the trees hold up well? I know nothing, as you can tell. Haha. For instance, if I planted a maple, how long before I could tap it?
so many great questions Katharine! Sadly it would be a few decades before you can tap a young maple. But the good news is there are 31 varieties of trees that can be used to make syrup (no one seems to know this… so many folks think its sugar maple or nothing) and every single state in the U.S. has at least one native tree that is good for making syrup. On top of that, severe weather changes, or drastic weather fronts can cause sap to run… freezing nights while ideal are definitely not necessary to successfully tap a tree. All this and so much more is explained in Sweet Maple.
I need to get me some Sweet Maple! 🙂 Thanks for all the hard work you do to spread the sweetness! <3
How do you clean this system? How often do filters/membranes need to be cleaned?
Hi noah. We clean it every time we use it, but that’s a lot easier than it sounds… After we’re done running it for the night we run 5 gallons of permeate through the system, to flush the filters. At the end of the season, after flushing them well, we then place the filters in a large ziploc bag in the freezer until the following season.
Follow up questions re: cleaning. I flushed the system after each run. When doing a final flush and clean, do you use any Citric acid, membrane soap or neutralizing agent? When searching “maple trader”, some were using these. Also, I am getting conflicting messages regarding storage…..you freeze your RO filters, correct?
And finally, do you replace your filters with any regularity?
Thank you again for sharing your wisdom!